
Getting started
The steps from a new workspace to your first sent quote.
A new workspace needs six things before it can send a quote: your brand, a catalogue, prices, a customer, a layout and the quote itself. Baylogik tracks each one for you and ticks it off from real data. There is nothing to mark done by hand.
Most teams get from sign-up to a sent quote in under an hour. The steps below are in the order most teams take them, but nothing stops you doing them in another order.
Step 1: Find the setup checklist
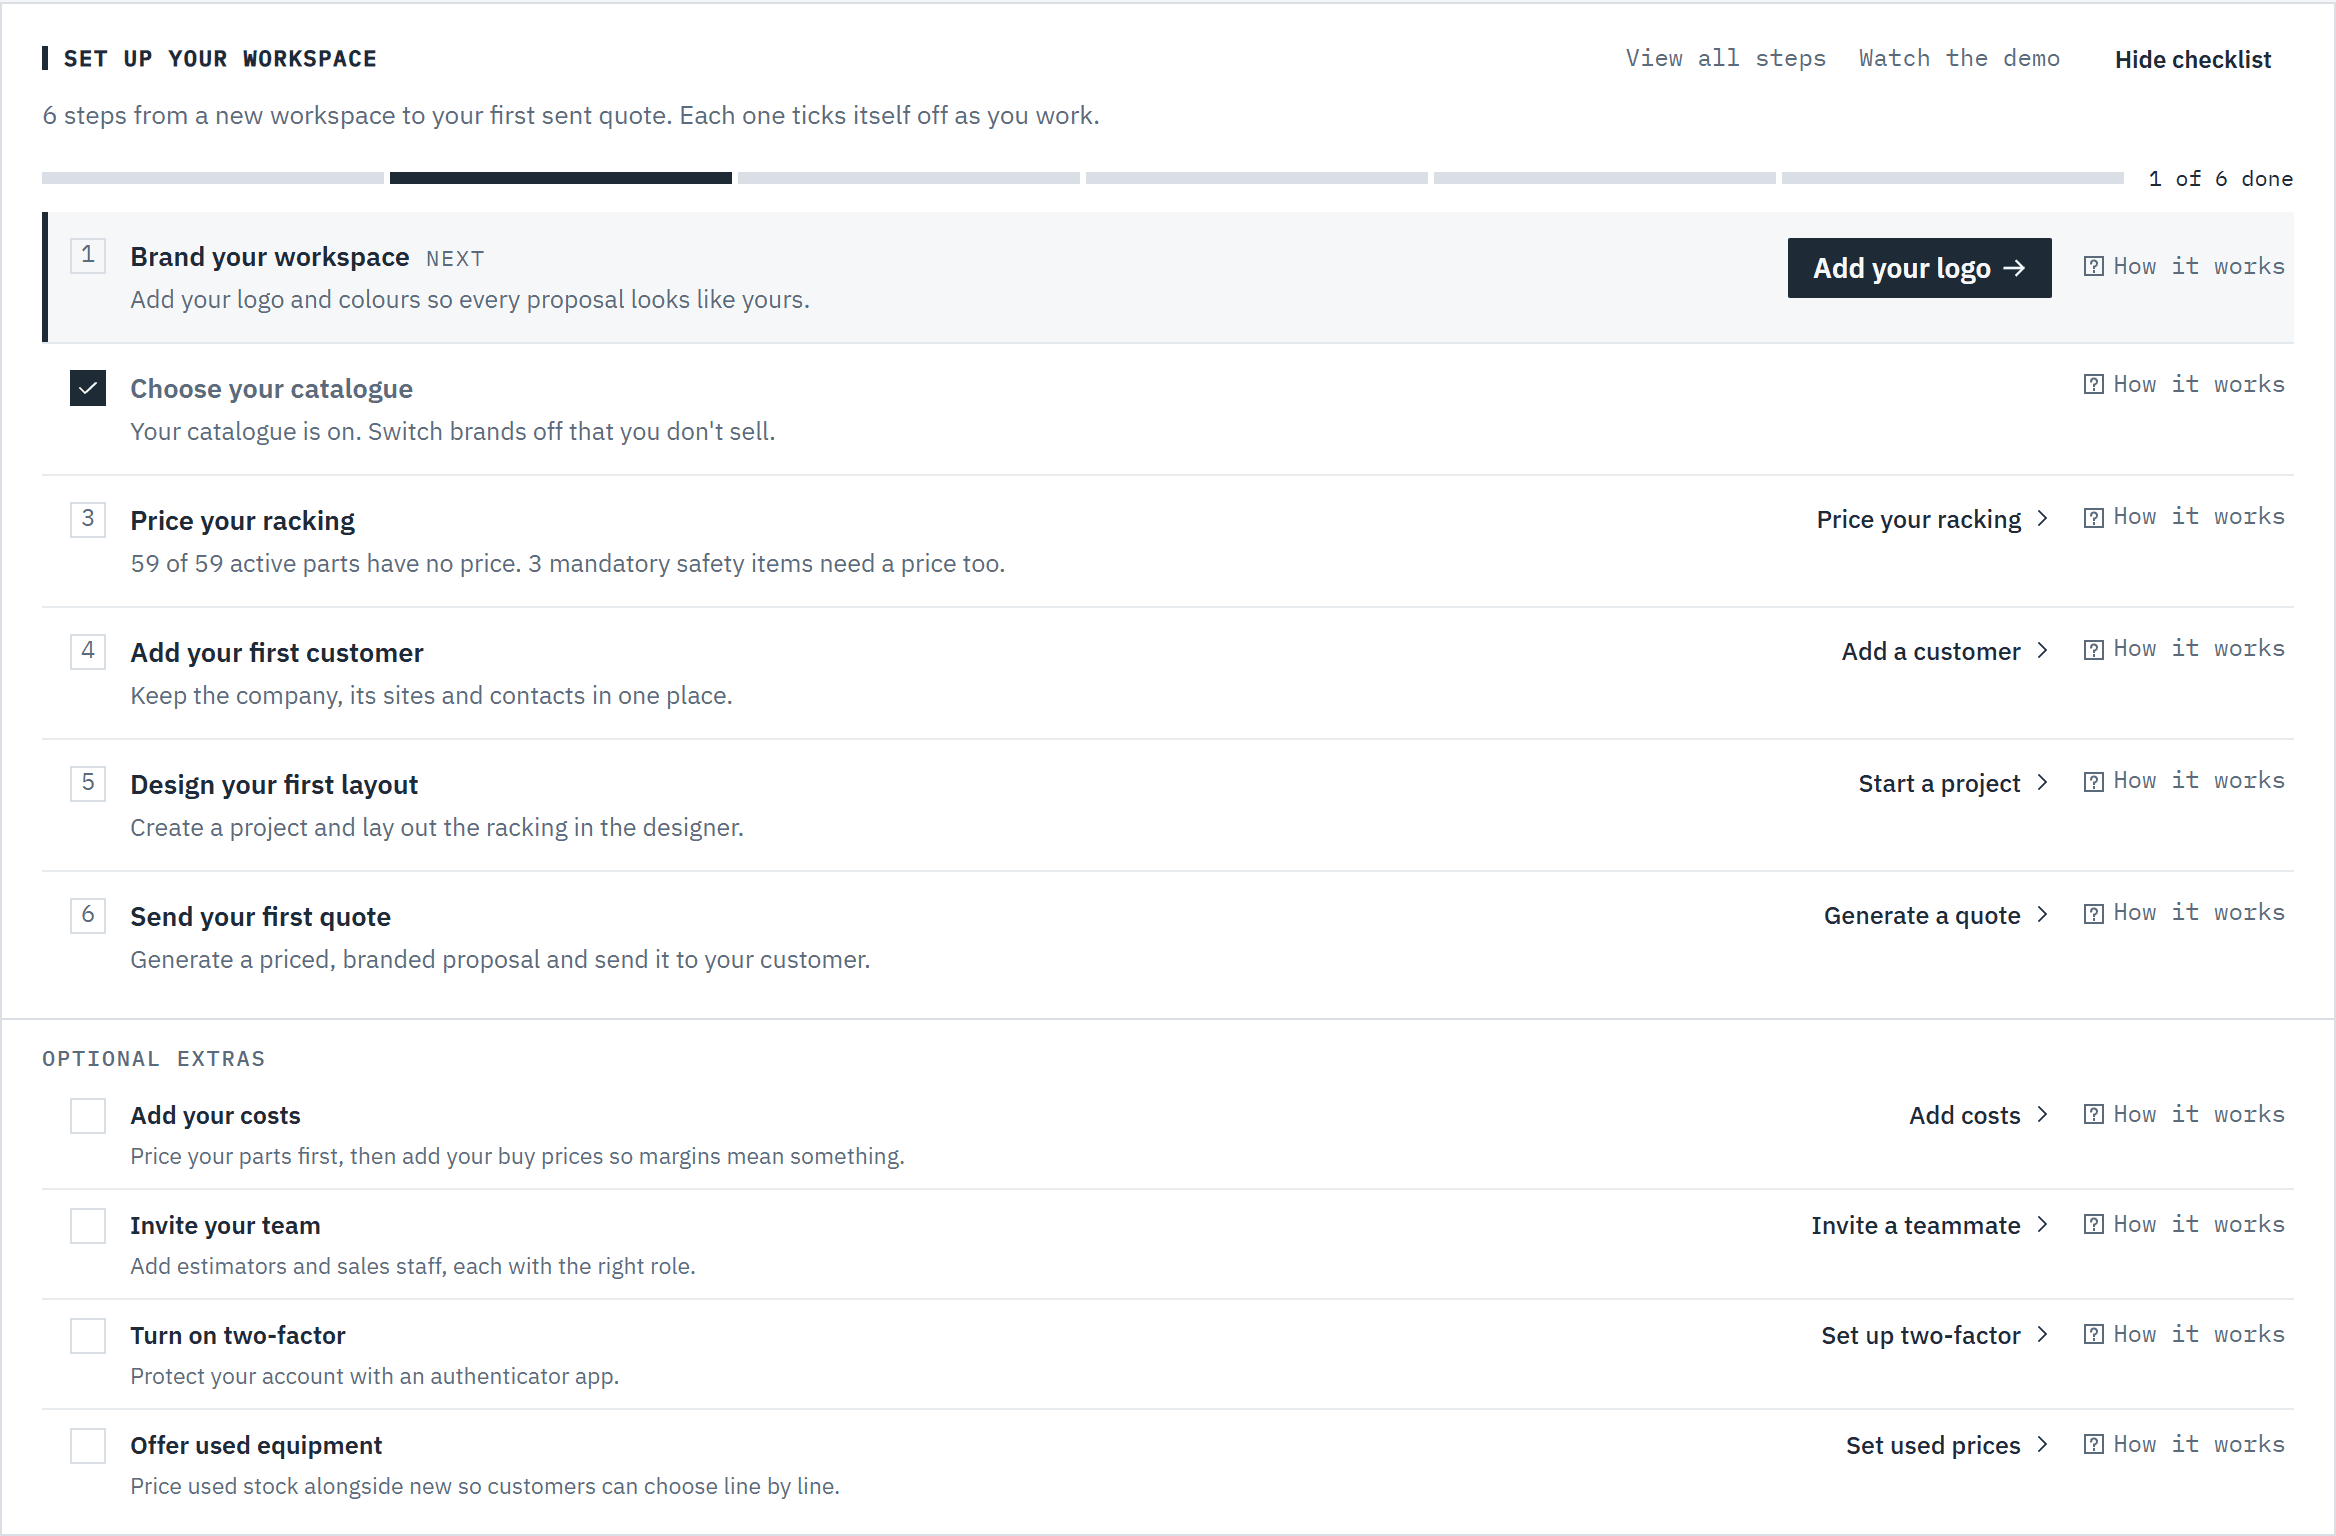
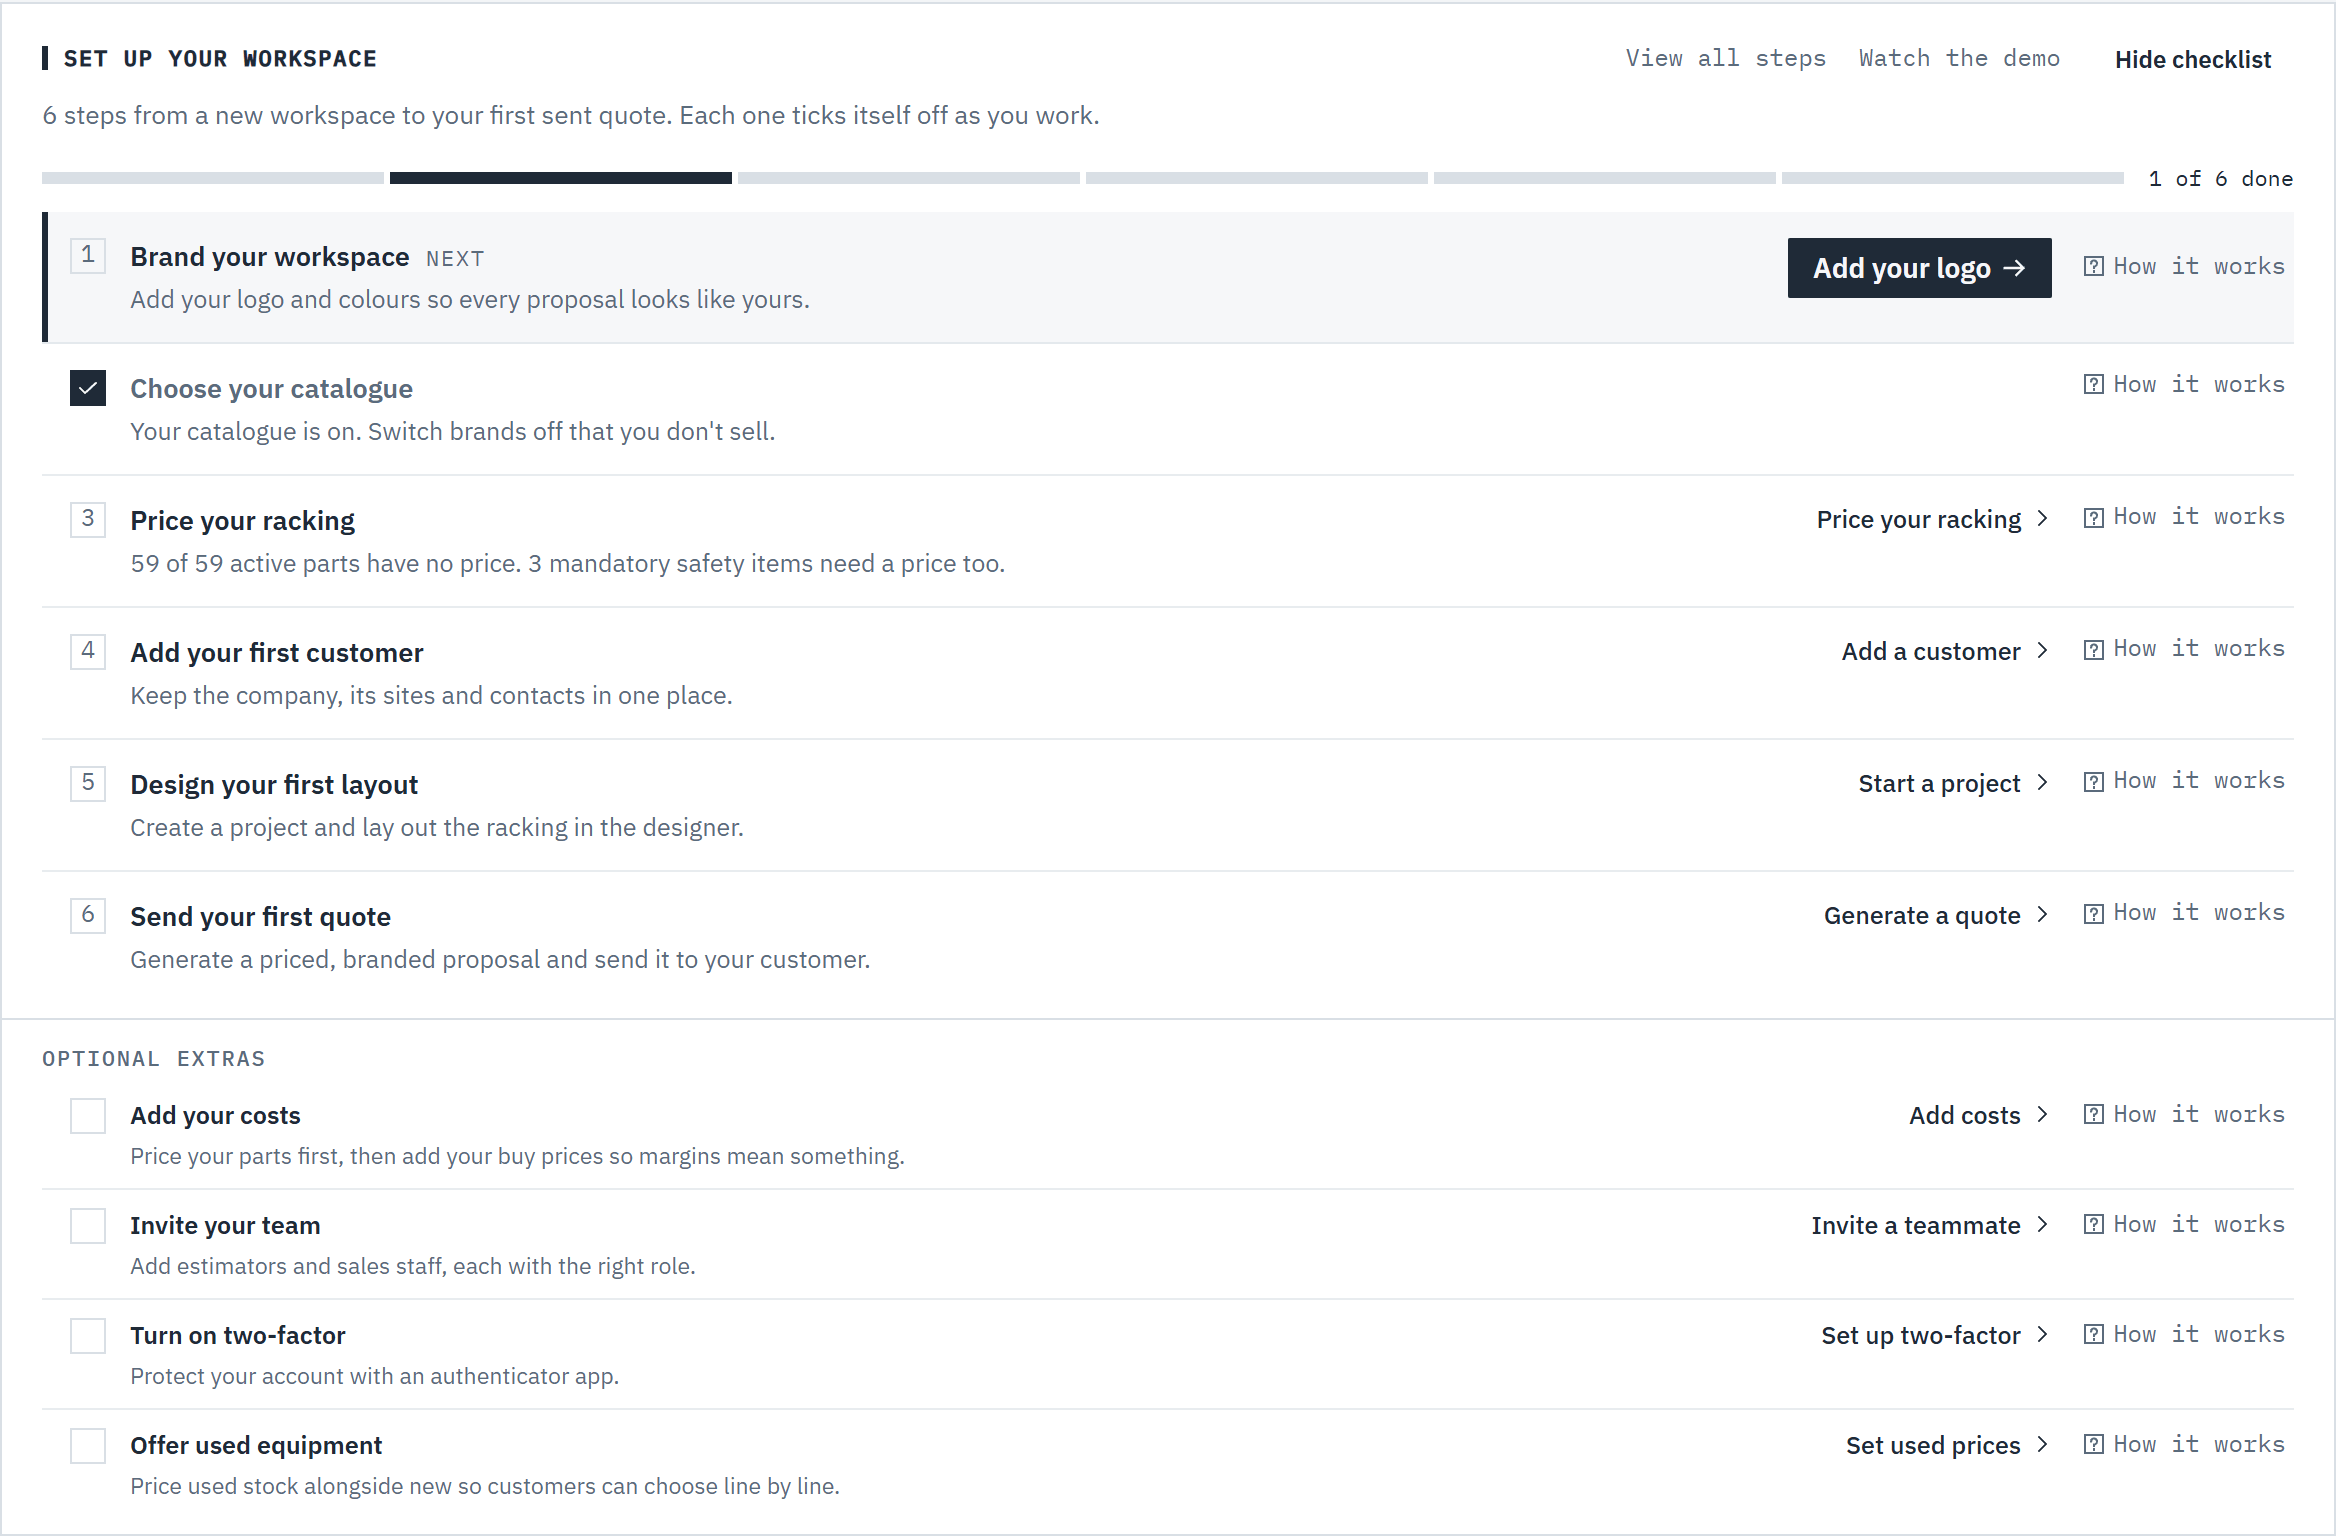
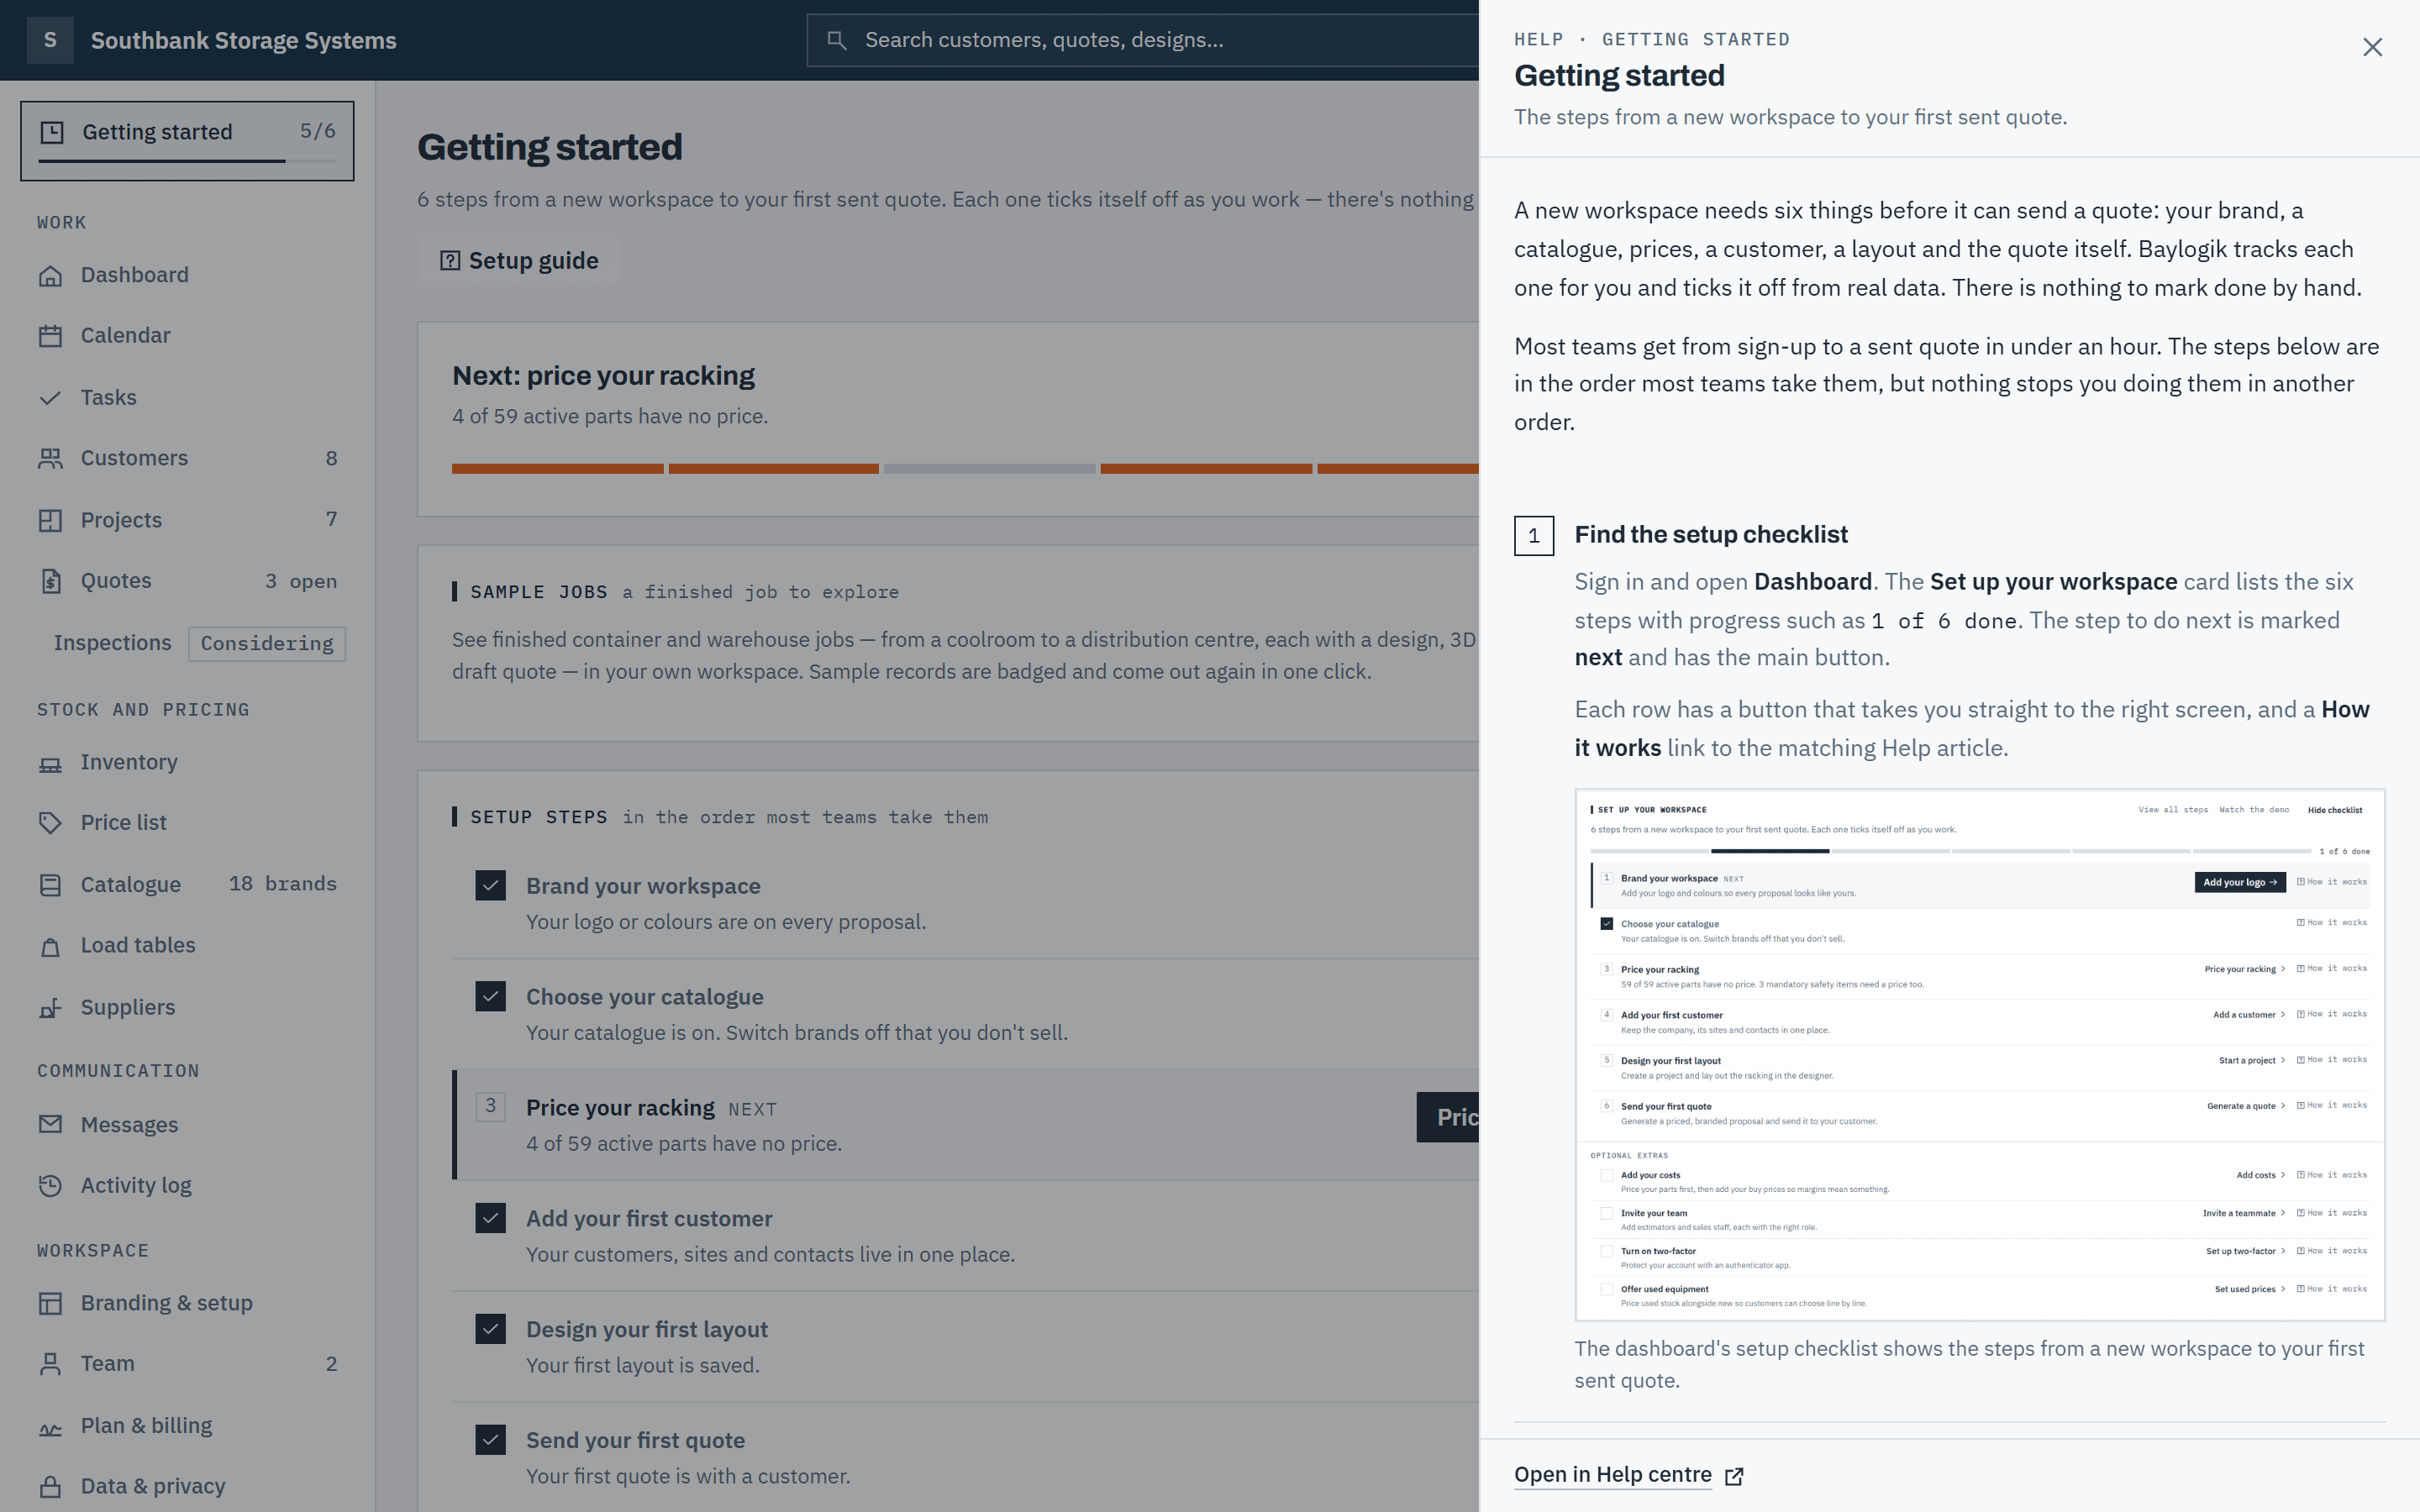
Sign in and open Dashboard. The Set up your workspace card lists the six steps with progress such as 1 of 6 done. The step to do next is marked next and has the main button.
Each row has a button that takes you straight to the right screen, and a How it works link to the matching Help article.
 (opens full size in a new tab)
The dashboard's setup checklist shows the steps from a new workspace to your first sent quote. Step 2: Read how a step works without leaving the page
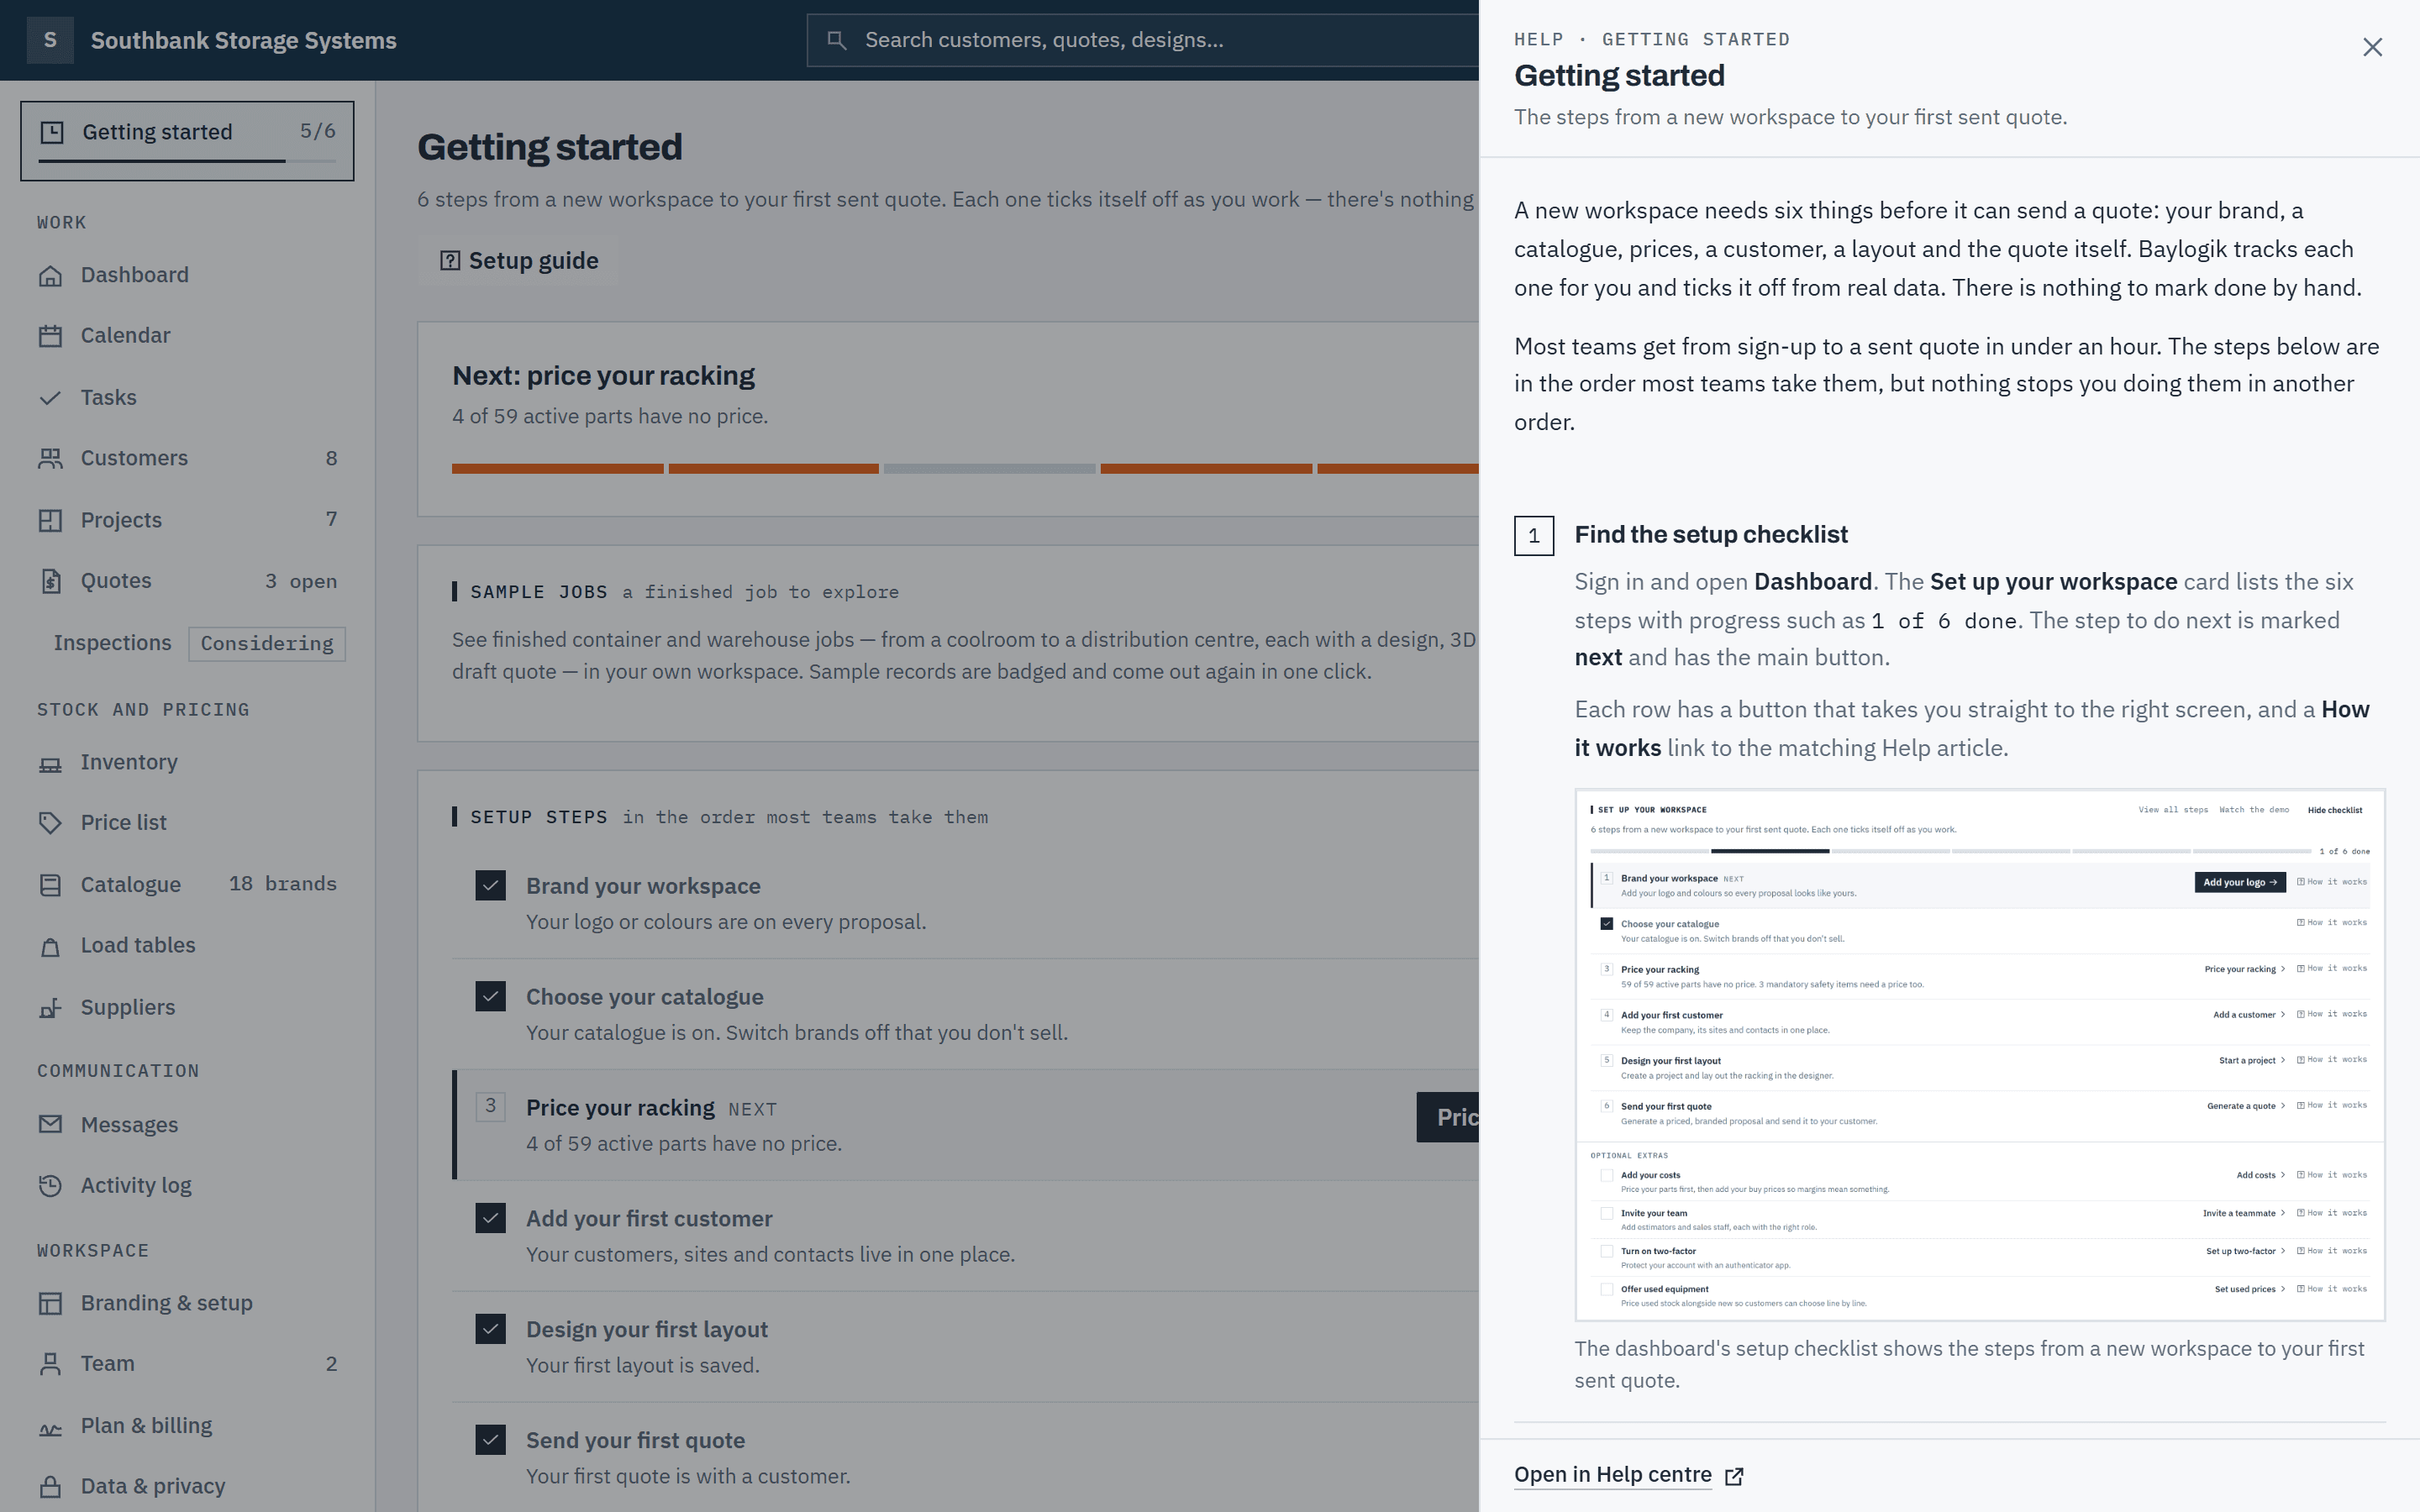
Choose How it works on any step, or Setup guide on the Getting started page. The article opens in a panel on the right, and links inside it open there too. Open in Help centre shows the full page in a new tab. Close the panel with its close button or Esc.
 (opens full size in a new tab)
How it works opens the article beside your work; Open in Help centre shows the full page. Step 3: Brand your workspace
Choose Add your logo. Upload your logo and set your colours so every proposal, portal page and email looks like yours. The step completes when a logo is uploaded or any colour is changed from the default. See Brand your workspace.
Step 4: Choose your catalogue
Choose Choose brands and switch on the racking brands and categories you sell. It completes as soon as at least one branded product is available in the designer. See Choose your catalogue.
Step 5: Price your racking
Choose Price your racking. The price list opens at a panel that says how many of your active frames and beams still have no sell price, such as 37 of 52 active parts have no price. The quickest way is Import a supplier price file. If a product has a published RRP with a source and date, Start from RRP can set its sell price as a starting point, marked Indicative. You can also type sell prices in the table.
The step completes when every frame and beam the designer offers you has a sell price. Switch off the brands and parts you don't sell in Catalogue and they stop counting. See Price your racking and Import a supplier price file.
Step 6: Add your first customer
Choose Add a customer and enter the business and its primary contact. It completes when any customer exists. See Customers, sites and contacts.
Step 7: Design your first layout
Choose Start a project. On Projects, choose + New project, then Start designing, enter the room and pick your frames and beams. It completes when the designer has saved a design; an empty project doesn't count. See Projects and Design a layout.
Step 8: Send your first quote
Choose Generate a quote from the project, review the draft and send it. If a draft already exists the button reads Send your draft. It completes when any quote has been sent. See Create and send a quote.
Step 9: Check progress on the Getting started page
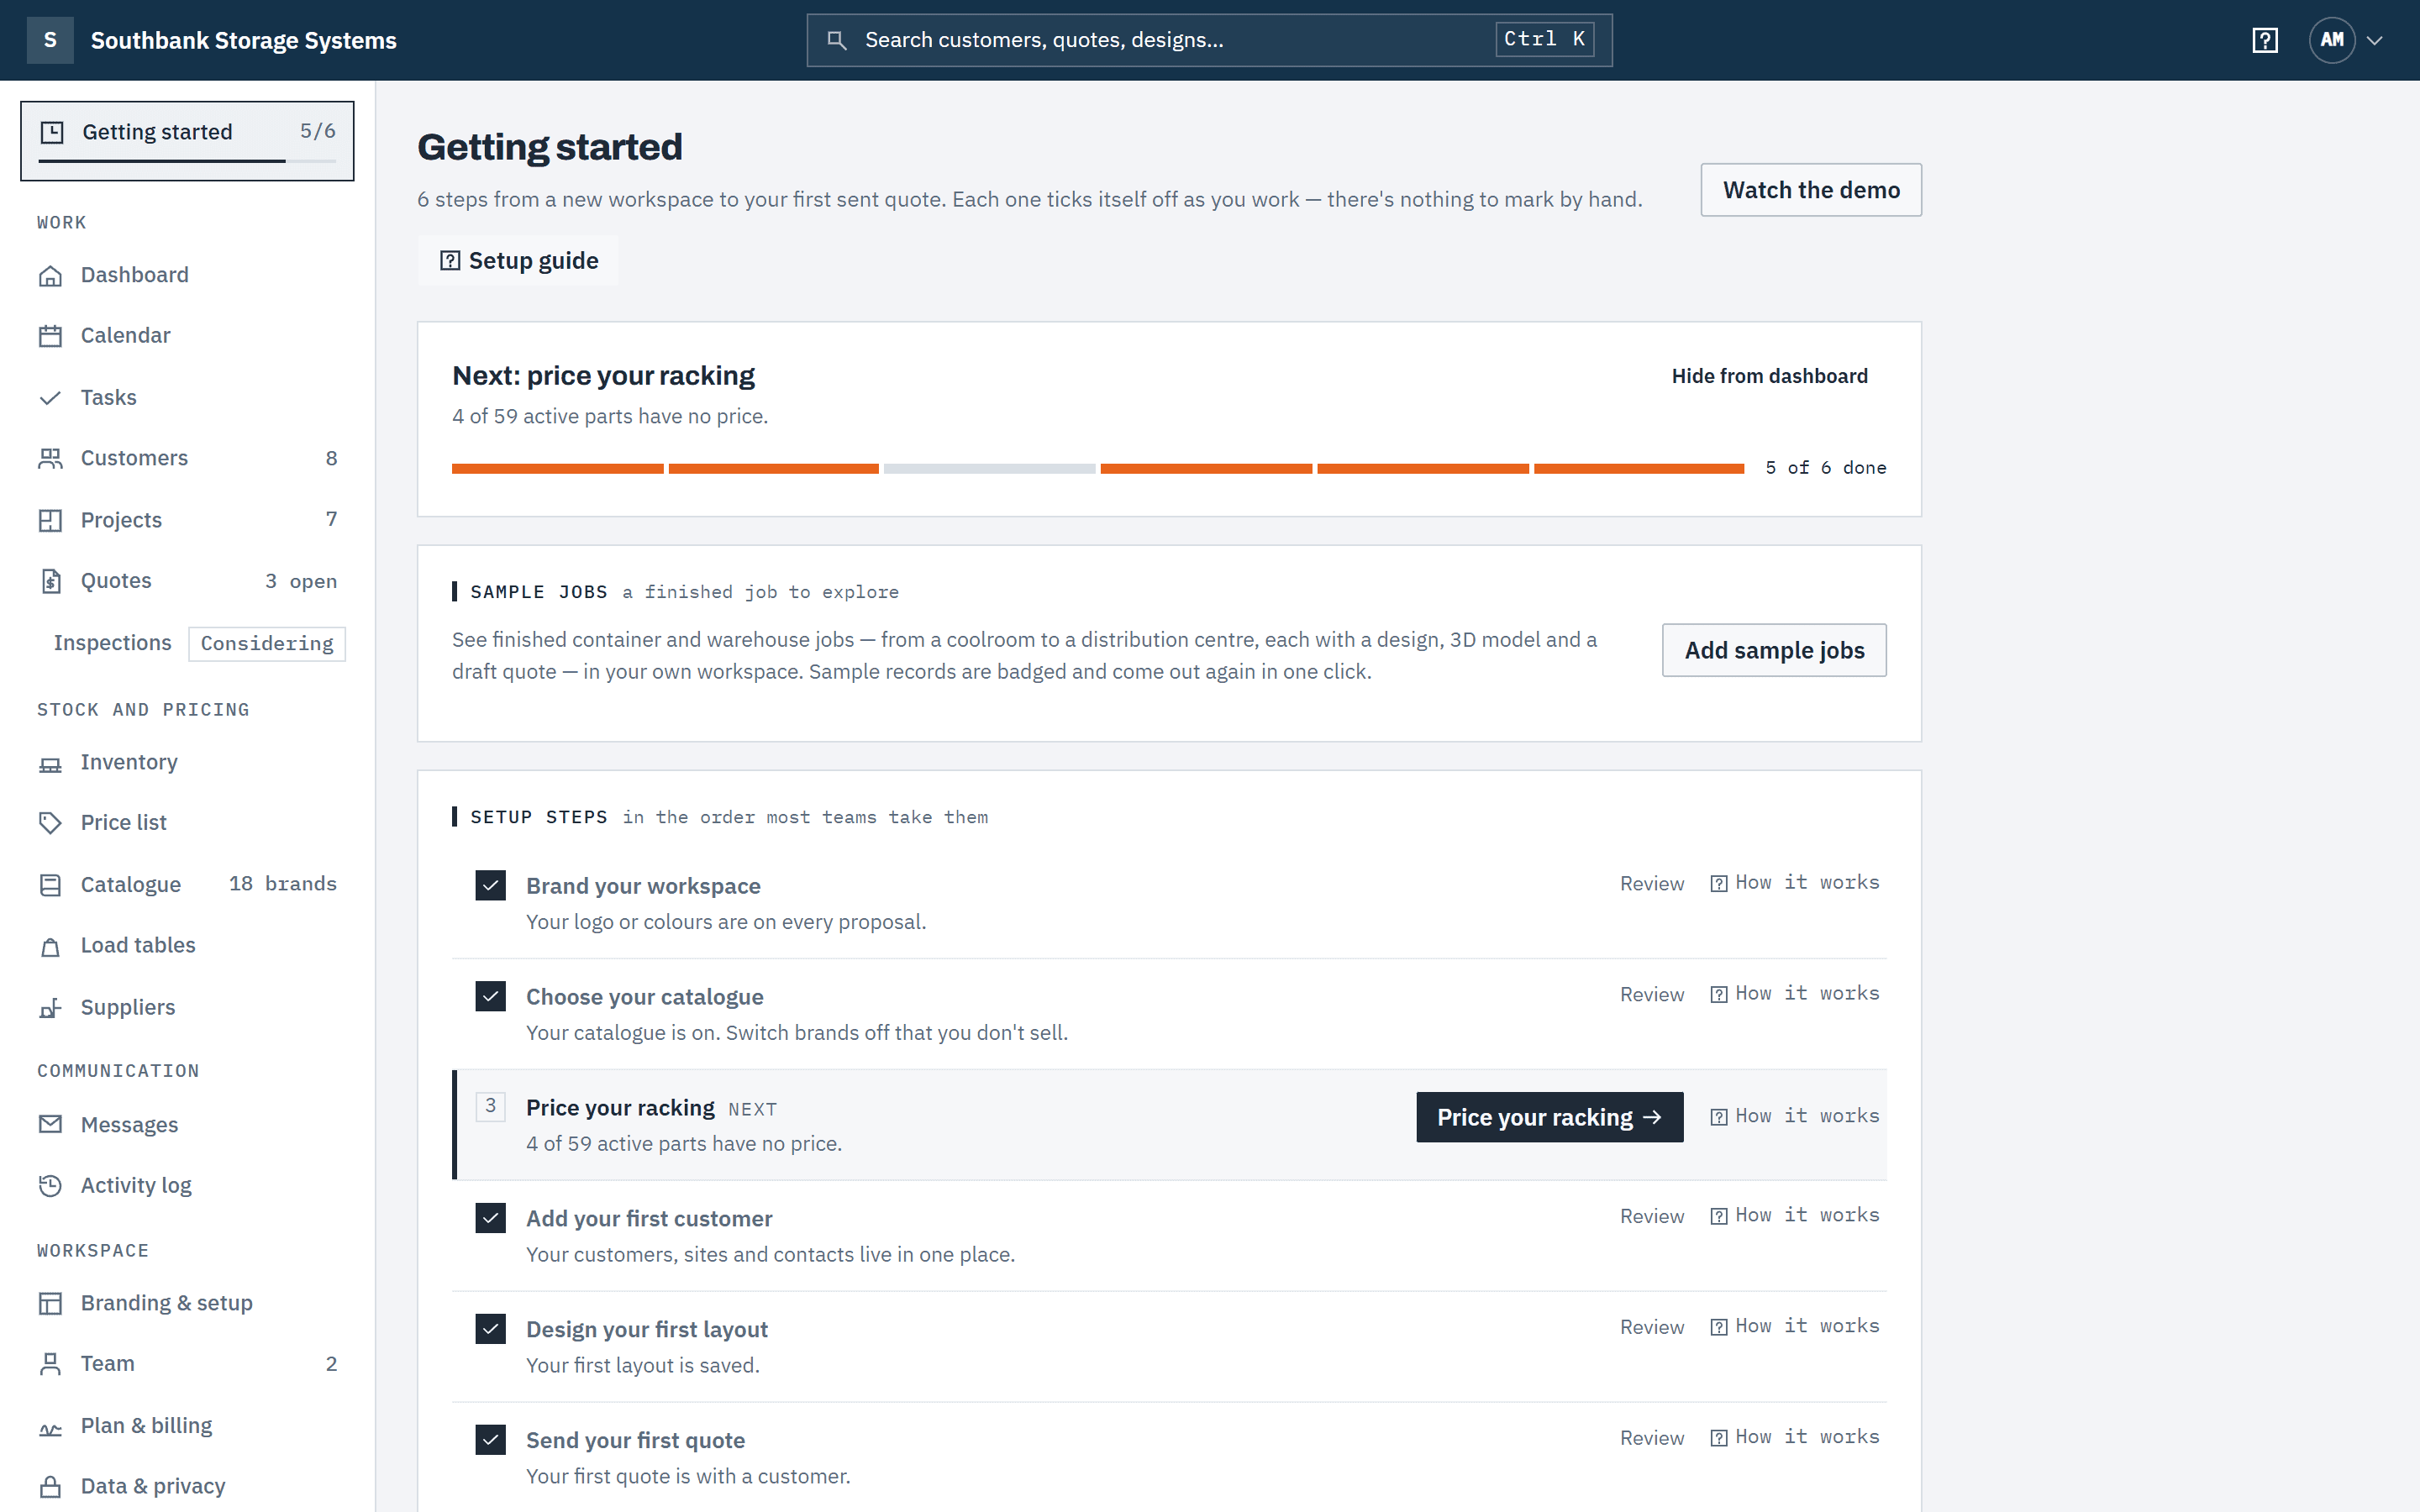
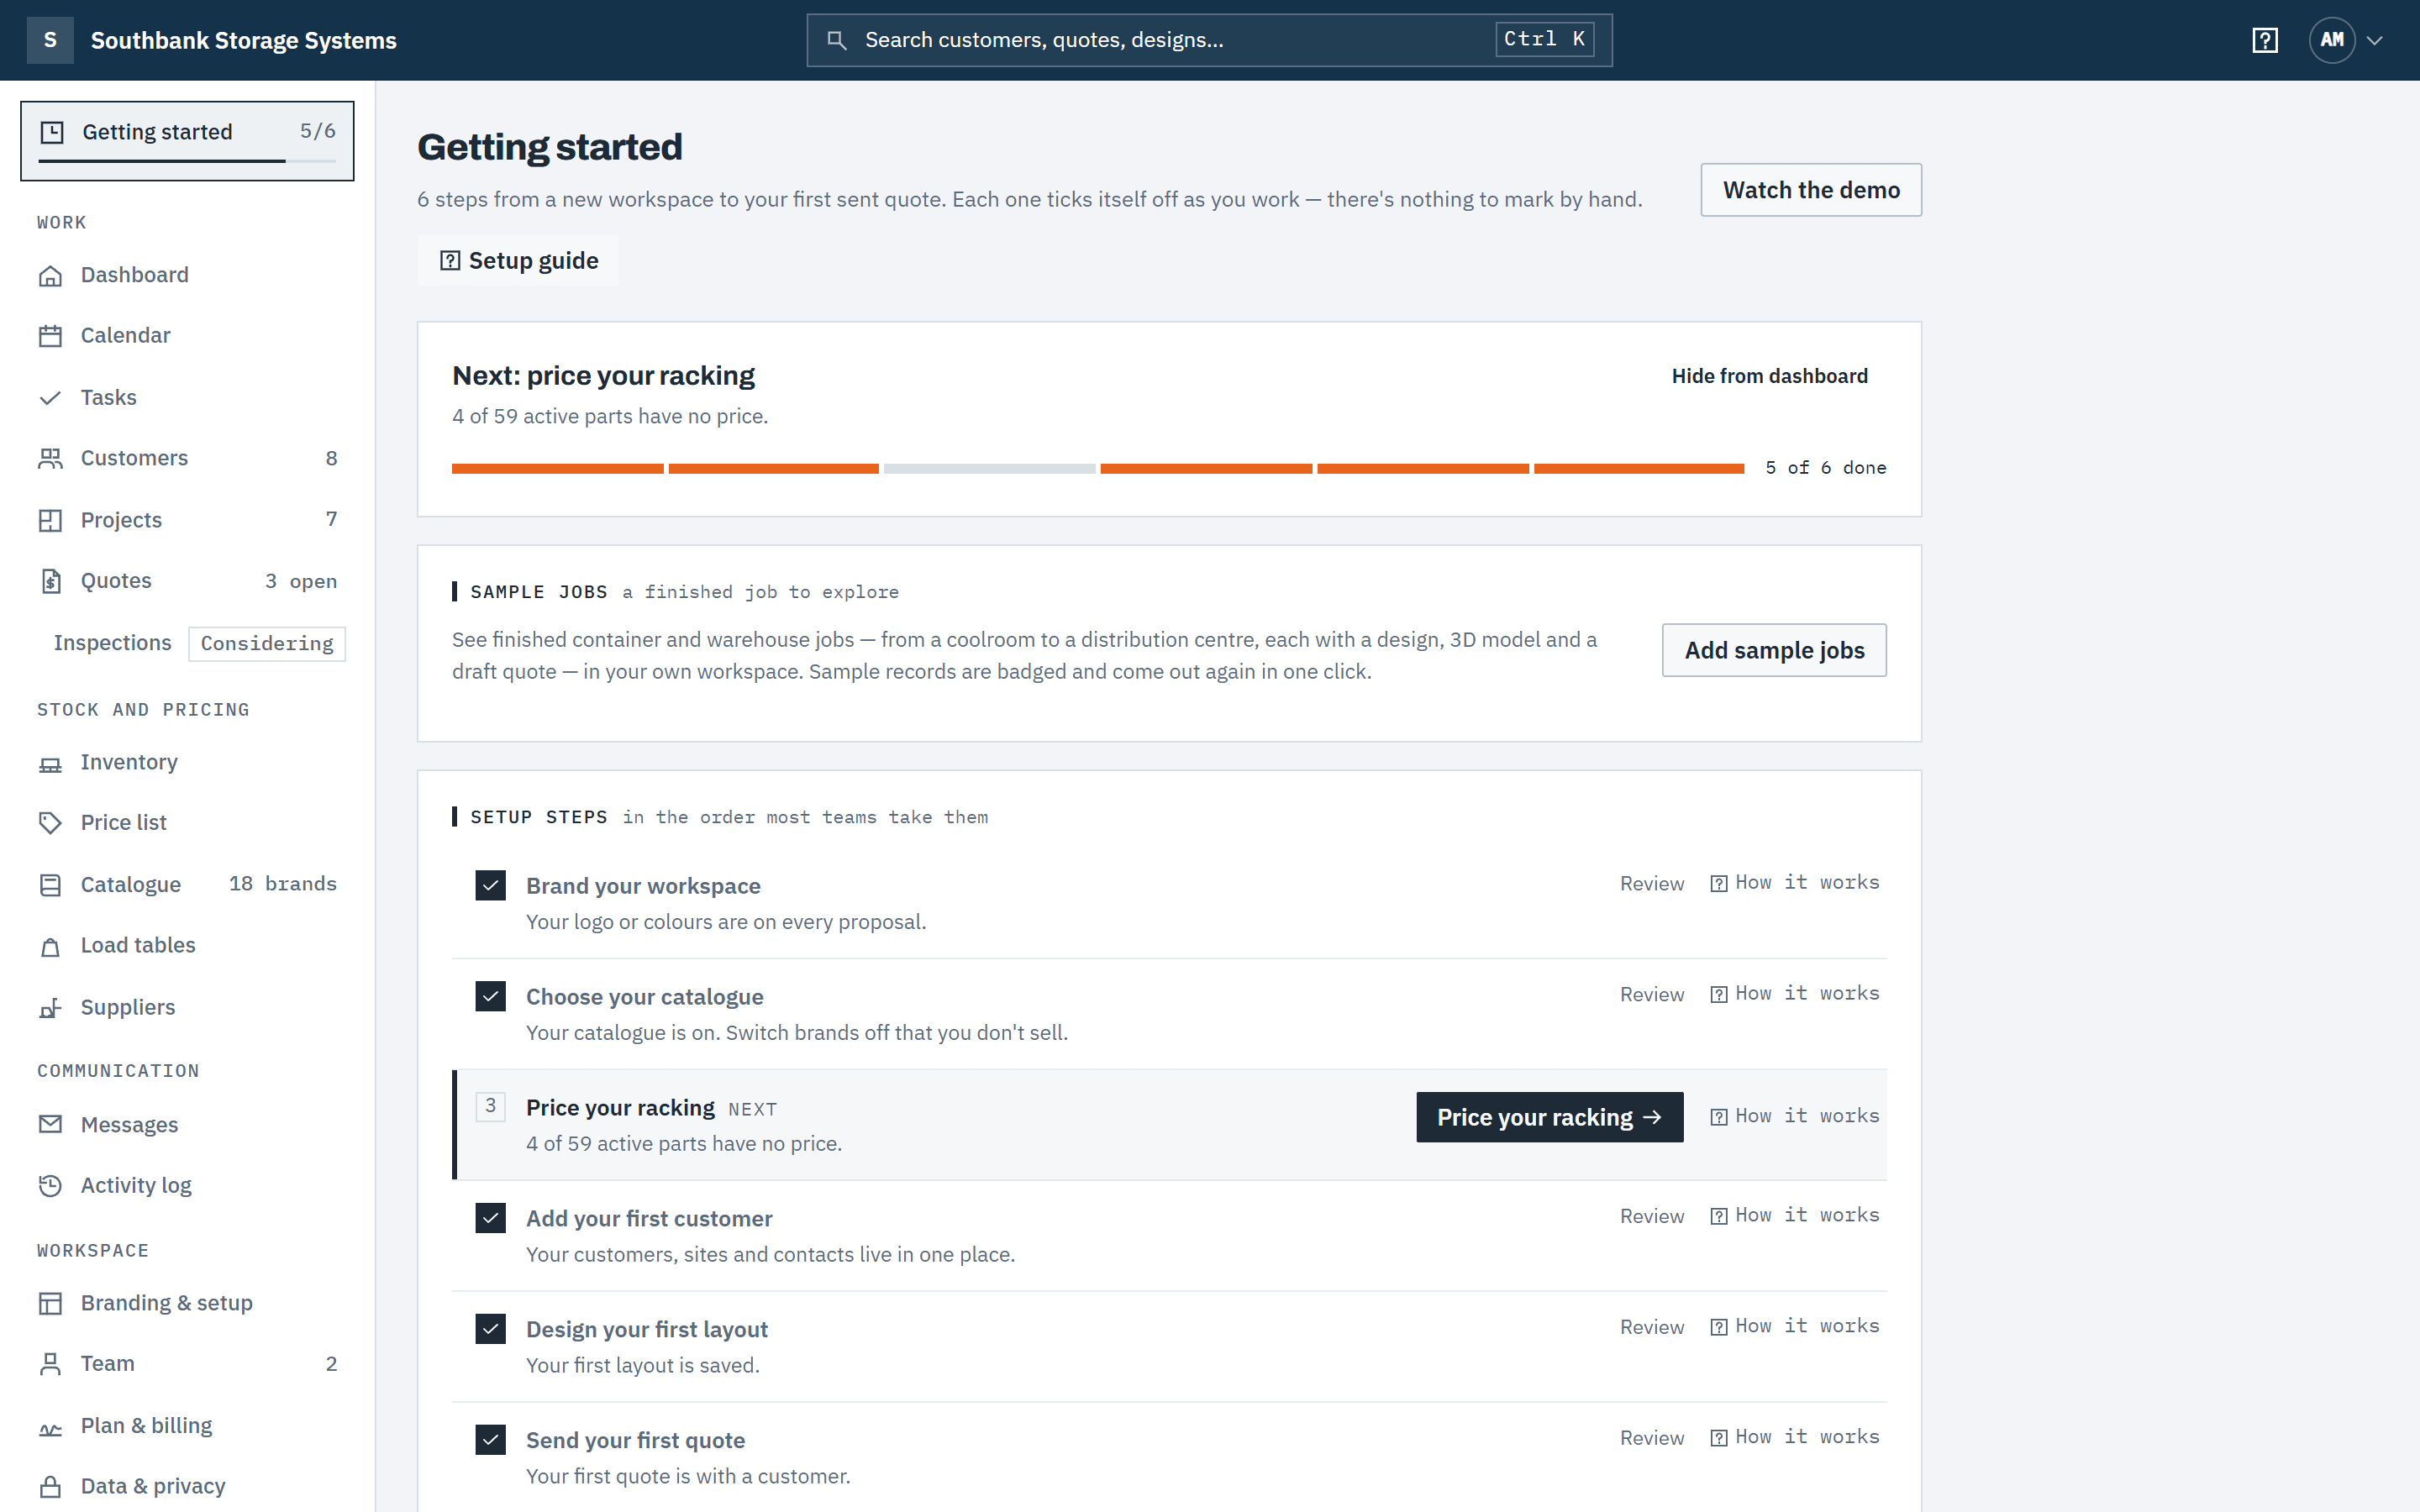
Choose View all steps, or Getting started at the top of the navigation, to see Setup steps and Optional extras on one page. Finished steps show Review so you can go back and change them.
 (opens full size in a new tab)
Getting started lists every setup step, links straight to each, and ticks them off as you go.
Sample jobs
A new workspace starts with four sample jobs so you can see a finished job straight away: two in the container designer (coolroom shelving and a 20 ft shipping container fit-out) and two pallet-racking warehouses (a small warehouse, and a distribution centre with columns, an office and a dock in the way). Each has a saved design, 3D model and a draft quote for a sample customer. Every sample record shows a Sample badge, and none of them counts towards the setup steps.
Step 10: Open a sample job
On Getting started, the Sample jobs card lists all four jobs. Choose Open a sample job, or Design or Draft quote on any row. The designs use real catalogue frames and beams; capacities show only where the catalogue holds a sourced rating, otherwise they read not certified. The distribution centre shows the pallet positions lost to its columns, office and dock.
Step 11: Why the sample quotes aren't priced yet
Sample quotes are priced the same way as yours: only from your own price list. Baylogik never invents prices, so until you set yours the sample lines read Not priced, the totals say Not priced yet, and the quote's internal note explains why. Choose Price your racking: import your supplier's price file, or enter your sell prices on the price list, then reprice the draft. A sample quote can't be sent: choose Duplicate as a real job to make your own copy. See Price your racking.
Step 12: Remove or add the sample jobs
Owners and admins choose Remove sample jobs on the card. It first lists what will be deleted and what will be kept, and nothing goes until you choose Confirm removal. A sample job you've worked on is kept as your own (the Sample badge comes off): one with a quote that has been sent, or with stock moved against its quote. So is a sample customer one of your jobs uses. A copy made with Duplicate is always your own job. When a sample job is missing, Add the missing sample jobs brings back just the missing ones. Both are recorded in the Activity log. To look without an account, the public See a sample job click-through is on the home page.
Optional extras
Worth doing, but they don't hold up setup. They sit under the six steps and never count towards 6 of 6.
Step 13: Add your costs
Add costs asks for your buy prices, so the margins on your quotes mean something. It shows to the roles that can see costs (owner, admin and finance), and is done when at least 80% of your priced frames and beams have a cost. Prices started from an RRP are counted as indicative until you set them from your supplier costs. See Price your racking.
Step 14: Invite your team
Invite a teammate with the right role. Done when the workspace has two or more members or an invitation is waiting. See Invite your team.
Step 15: Turn on two-factor
Set up two-factor takes you to your account page. This one is personal: every member, whatever their role, can and should do it. See Two-factor authentication.
Step 16: Offer used equipment
Set used prices lets you quote second-hand stock alongside new. Done when any item has used pricing switched on. See Used pricing and stock.
Find your way around
Step 17: Use the menu
The navigation on the left is grouped by the work:
- Work: Dashboard, Calendar, Tasks, Customers, Projects and Quotes.
- Stock and pricing: Inventory, Price list and Catalogue.
- Communication: Messages and Activity log.
- Workspace: Branding & setup, Team, Plan & billing and Data & privacy.
You only see the items your role can use. See Roles and permissions.
Step 18: Search, sort and page through lists
Lists such as customers, projects, quotes, tasks, stock and the activity log work the same way. Type in the search box and the list narrows as you type. Click a column heading to sort by it, and click it again to reverse the order. Long lists show 25 rows a page: move with ← Previous, the page numbers and Next →, or choose Show 50 or 100. Your search, filters and sort are kept in the page address, so you can bookmark a view or send it to a colleague. If nothing matches, Clear search and filters starts again.
Good to know
- Each step needs a particular role, and a step's button shows only for roles that can do it. Estimators see who can do the rest, for example owner, admin or finance on prices. Read-only members see the checklist for reference. See Roles and permissions.
- Owners and admins can hide the checklist with Hide checklist on the card, or Hide from dashboard on the Getting started page. The page itself stays available.
- When all six steps are done, the dashboard shows Your workspace is ready for 14 days. A finished step stays finished, even if you later delete the data that completed it.
- The navigation shows Getting started with your progress, for example 3/6, until setup is complete or the checklist is hidden.
- On a phone, the navigation opens from the menu button (three lines) at the top left. Wide tables scroll sideways inside their card. The designers show the layout read-only (design on a tablet or desktop), and a project's Files card adds Take a photo to upload a site photo straight from the camera.
Related articles
- Take the interactive tourThe guided tour of your workspace, the top bar, and a click-through of Baylogik from room to signed quote.
- Your dashboardQuote health, what needs a decision today, and your tasks for the week.
- Brand your workspaceLogo, colours and the proposal your customers see.
- Create and send a quoteGenerate, review and send a priced, branded proposal.