
Doors, exits and docks
Mark exits, docks and stairs in the warehouse designer, and read the route checks.
In the warehouse designer you mark the building's doors, docks and stairs on its walls. Each one has a clear zone in front of it, and racking stays out of it: the bays it would cover are left out of the layout, so the stat strip, the parts list and the quote count only the racking that can go in.
Once a design has at least one door, dock or stair, the designer also checks the way out: whether people can walk from every aisle to an exit, how long a dead-end aisle is, and how far apart the exits are. These checks compare the layout with your own house settings. They are prompts to check egress with the people who decide it — the site's building certifier (in New Zealand, the building consent authority) and the fire safety engineer — not an egress assessment.
Mark doors and docks
Step 1: Add a door, dock or stair
On Setup, under Doors and docks (directly above Keep-outs), choose Add. Pick the kind first: Exit door, Door, Roller door, Dock door, Drive-in door, Opening or Stair. The form shows the fields that kind needs.
Choose the wall, then the distance along it in millimetres: on the top and bottom walls it's From the left wall, on the left and right walls From the top wall, as drawn on the floor plan. Then enter the width. Doors take the number of leaves, the swing (out or in) and the hinge side; a dock door can have a pit or edge leveller; a stair takes its length and which end people step off.
Counts as an exit is on for an exit door and off for everything else; turn it on for any door the building uses as an exit. For a roller, dock or drive-in door the switch reads: Roller, dock and drive-in doors generally can't serve as exits — see the warning. A stair never counts as an exit.
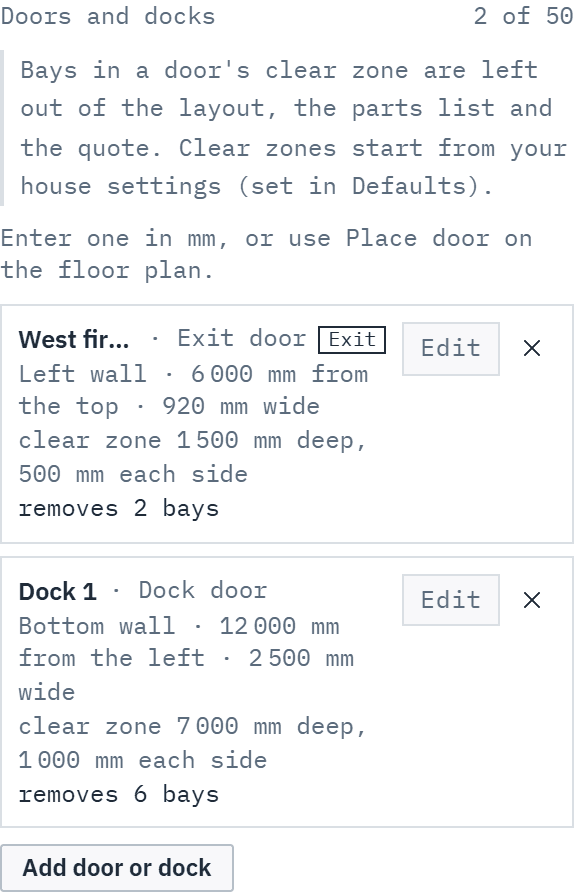 (opens full size in a new tab)
Setup → Doors and docks: each door shows its wall, width, clear zone and the bays it removes. Step 2: Place a door on the plan
On a tablet, laptop or desktop, pick the kind beside Place door above the floor plan, then choose Place door. Click a wall where the door starts — the point snaps to the nearest wall — then click the same wall where it ends. The door is added to the list on Setup with your house clear zone, and Undo takes it away in one step.
From the keyboard, the arrow keys move the crosshair and Enter places a point; Esc clears the first point, and pressing it again stops placing. On a phone, add and edit doors from the list instead: placing them on the plan needs a wider screen. There, the delete button asks first — Delete Dock 2? with Delete and Keep — because phones have no Undo.
Step 3: Set the clear zone
The clear zone is the floor kept free in front of the door: a depth into the building and a margin either side. A new door takes your house clear zone for its kind from Defaults & clearances, and you can change it for that door. The figure is written into the design when the door is added, so a later change to your defaults doesn't move doors you've already placed.
A door that swings in keeps at least its leaf clear (the full width for one leaf, half for two). A dock door's zone always covers its leveller plus the staging area, so racking is never quoted over a leveller pit: changing the leveller's size updates the clear zone, and a zone too small for it is refused (for example The clear depth must cover the leveller — at least 3 000 mm). A stair's zone is its footprint plus the landing at the end people step off. The clear zone is what you enter for the site; it isn't an engineering or code clearance.
Step 4: See what a door costs
Each door in the list says how many bays its zone removes. A bay goes when its footprint overlaps the zone; touching an edge doesn't count. The stat strip and Summary show lost to doors and docks separately from keep-outs, so you can see what each costs. When a door and a keep-out both cover a bay, it counts against the keep-out.
A row split by a door becomes two runs, so the quote adds the safety items each run needs, such as corner protectors on the new free-standing ends. That's intended: it changes the price of a draft quote when you regenerate it. Sent quotes never change.
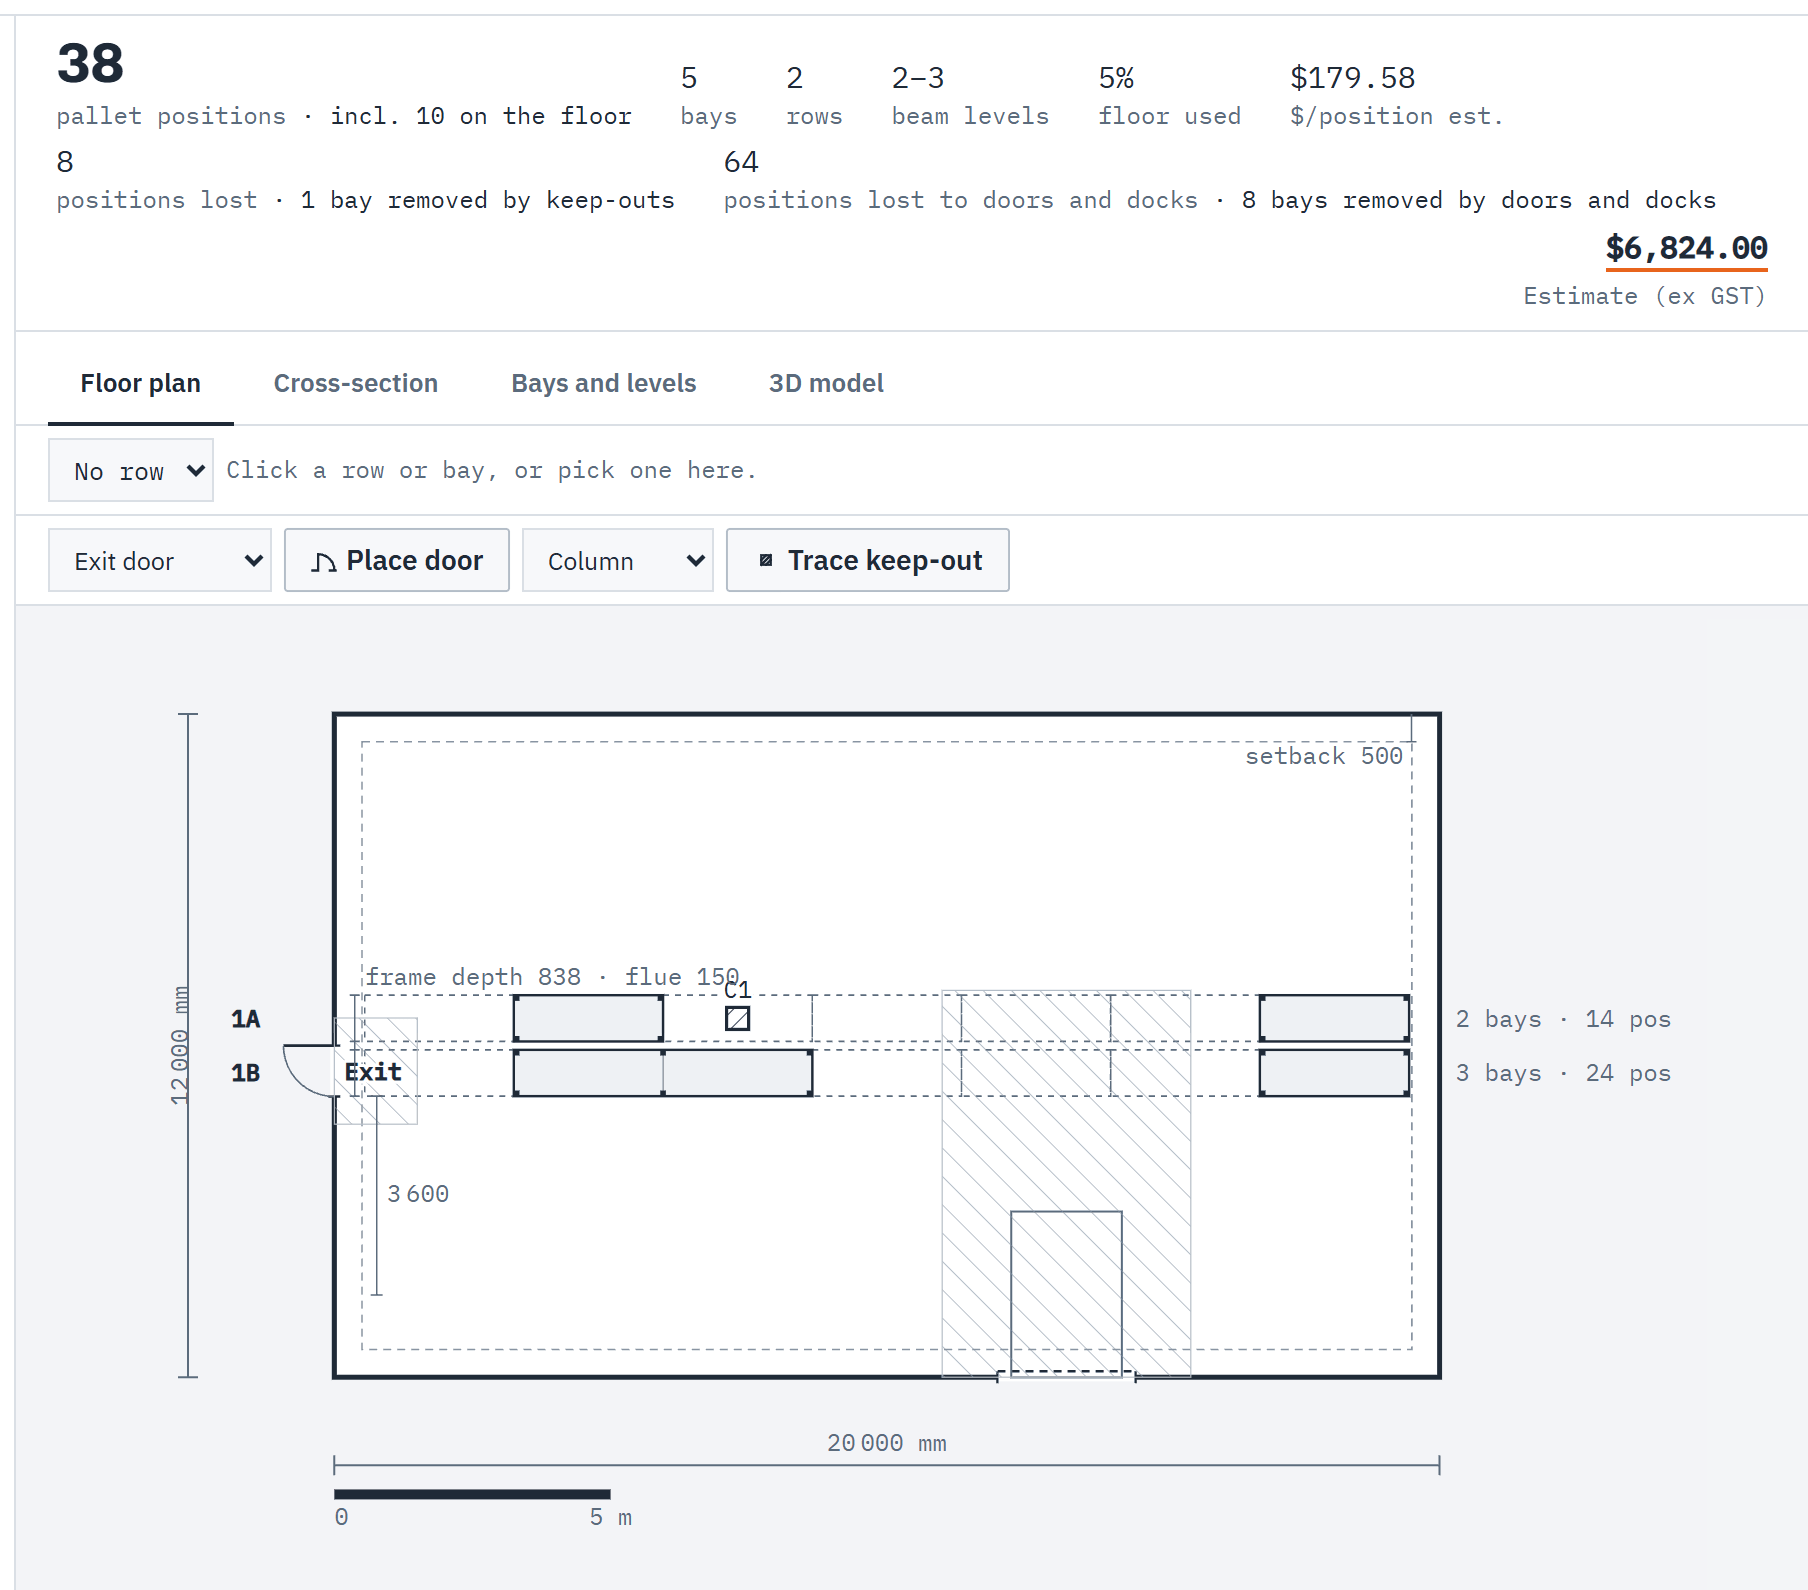 (opens full size in a new tab)
The plan draws each door on its wall with its clear zone; the stat strip counts the positions lost to doors and docks.
Exit and route checks
The checks run only on a design with at least one door, dock or stair. They work on a grid of the floor, so walking distances are shown as "about" a figure, to within one grid square (100 mm on most floors, a little more on very large ones); the path it walks is always exactly your walkway setting wide. The route checks need rows; racking, a column, office or other keep-out and a stair block the way, and a dock keep-out is treated as floor.
Step 5: Read the route warnings
A route is a clear path at least as wide as your Walkway past columns and keep-outs setting. Exit cut off means no such path reaches an exit from the aisles. Aisle with no way out means an aisle is closed off at both ends, or no path from it reaches a marked exit. Dead-end aisle gives the distance from the closed end of an aisle to where people can turn two ways, when it's more than your dead-end setting. A turn counts only if it leads somewhere — to an exit or into another aisle, a cross-aisle or a strip along the wall that joins one; a pocket left by a missing bay or a column doesn't. Its fixes widen the setback at that end or add cross-aisles. If no aisle is wide enough for your walkway setting, you'll see Exit routes not checked instead.
When the checks have run and raise nothing, Summary says No layout warnings are shown., with no tick: no warning isn't a pass.
The route and exit warnings end by naming who to check egress with: the site's building certifier, or the building consent authority when your workspace's tax country is New Zealand. Fixes change your racking — setbacks, cross-aisles or clear zones — or suggest marking another exit if the building has one. Setting a door's swing to out corrects what you entered, so use it only when the real door swings out.
Step 6: Read the exit and door notices
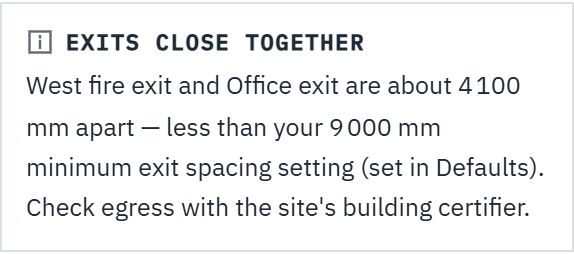
No exits marked appears when doors are entered but none counts as an exit. Only roller or dock exits warns when every exit is a roller, dock or drive-in door. Exits close together and Exits far apart compare the straight-line distance between the nearest parts of two exits with your minimum and maximum exit spacing.
Door opens onto a truck aisle notes a personnel or exit door whose clear zone overlaps an aisle used by trucks. Dock without a personnel door lists docks with no personnel or exit door within your setting. Exit door swings in offers to set an exit's swing to out. Stair landing blocked warns when a keep-out overlaps a stair landing, and Door or dock past the wall when the building was made smaller after a door was placed.
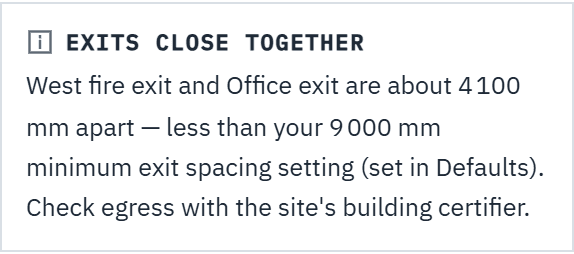 (opens full size in a new tab)
Route and exit checks compare your doors with your house settings and name who decides — here the site's building certifier. Step 7: Set your house settings
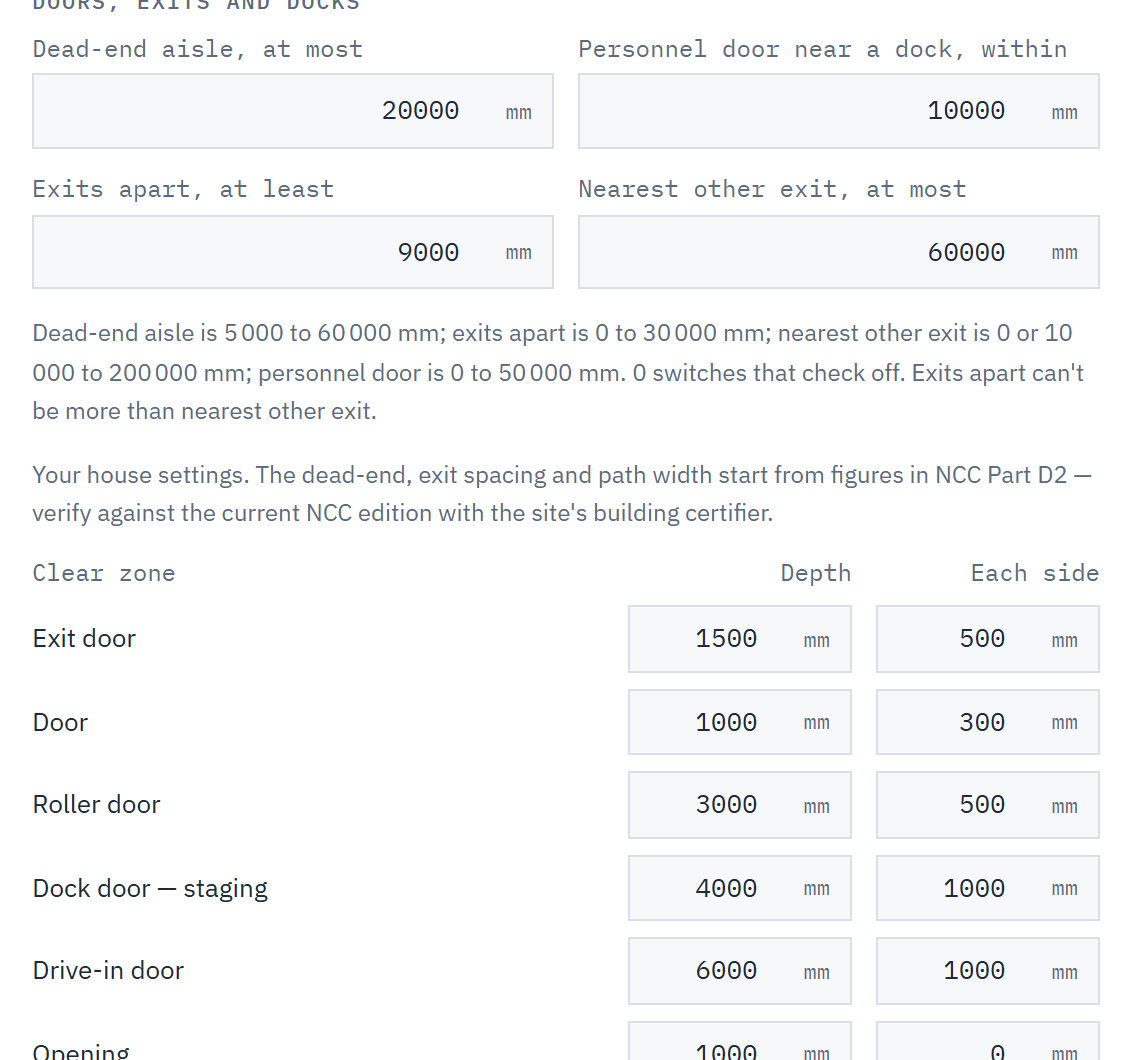
In Branding & setup → Defaults & clearances, the Doors, exits and docks group holds the settings the checks compare with:Dead-end aisle, at most (20 000 mm to start, 5 000 to 60 000 mm), Exits apart, at least (9 000 mm, up to 30 000 mm), Nearest other exit, at most (60 000 mm, 10 000 to 200 000 mm) and Personnel door near a dock, within (10 000 mm, up to 50 000 mm), plus the clear zone each new door starts with. 0 switches a spacing or personnel-door check off. The minimum exit spacing can't be more than the maximum: saving that is refused. The path width is your Walkway past columns and keep-outs setting.
They're your house settings. In Australia the dead-end, exit spacing and path width start from figures in NCC Part D2 — verify against the current NCC edition with the site's building certifier. The dock leveller size is indicative; check it with your supplier. See Brand your workspace.
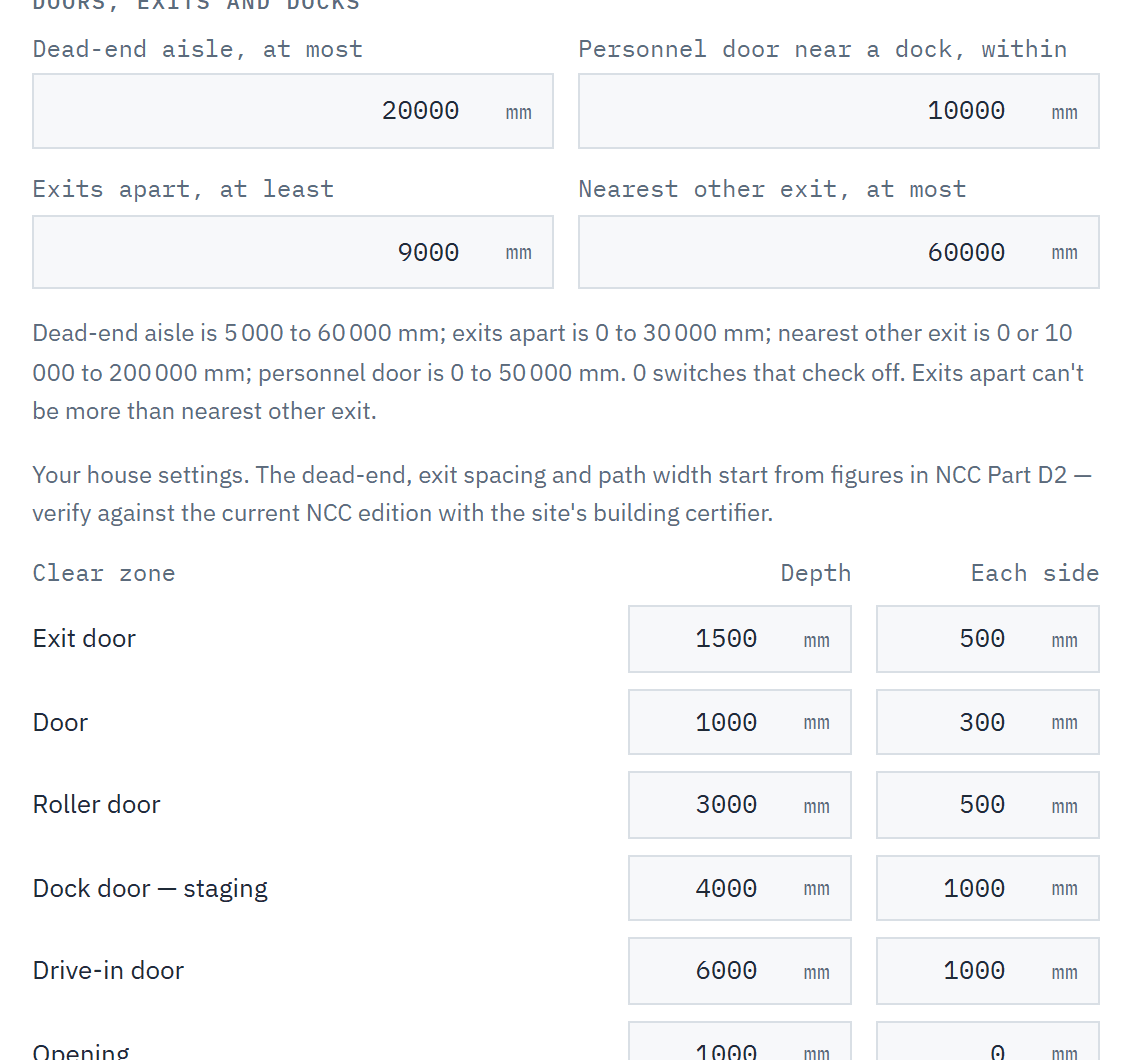 (opens full size in a new tab)
Defaults & clearances → Doors, exits and docks: your house settings for the checks, and the clear zone each new door starts with. Step 8: What your customer sees
The proposal and the online quote draw each door, dock and stair as a symbol on the floor plan, with the clear zones hatched and exits tagged Exit, and print this note under the drawing:
Doors, exits, stairs and docks are shown as entered for layout purposes. Egress, exit and fire safety requirements are for the site's building certifier and fire safety engineer to confirm.
In New Zealand the note names the building consent authority. Your labels, the warnings and the dead-end figures stay in the designer: your customer never sees them. See What your customer sees.
Good to know
- Doors, docks and stairs are only ever what you enter. Baylogik never works them out from the floor plan underlay or anything else, and nothing it draws says a building's exits are adequate.
- A drive-in door is a door a truck drives through. It has nothing to do with drive-in racking, which you choose as a racking type.
- Up to 50 doors, docks and stairs per design, counted separately from the 100 keep-outs.
- Dock zones you traced or added as keep-outs before v1.39.0 stay keep-outs. They aren't turned into dock doors, so add the docks if you want the route checks to see them.
- The container designer has no doors to mark: the container's door end is always treated as open.
- A design with no doors, docks or stairs draws, prices and prints exactly as before, and shows none of these checks.